 NGx Space
Pixhawk: Getting started with initial setup

Pixhawk is the most sought out flight controller for numerous applications among hobbyists and professionals. By pairing with a companion computer more advanced tasks can be performed like live object tracking, real time 3D image reconstruction, streaming data to the cloud and much more.
Ardupilot and Px4 are the most popular open source firmwares available for pixhawk. However Ardupilot is more mature than Px4, with more features and community support. Now let’s get started with the setup with Ardupilot.
Prerequisite
- xCopter with Pixhawk as flight controller with GPS.
- Mission Planner as Ground Control Station.
Instructions
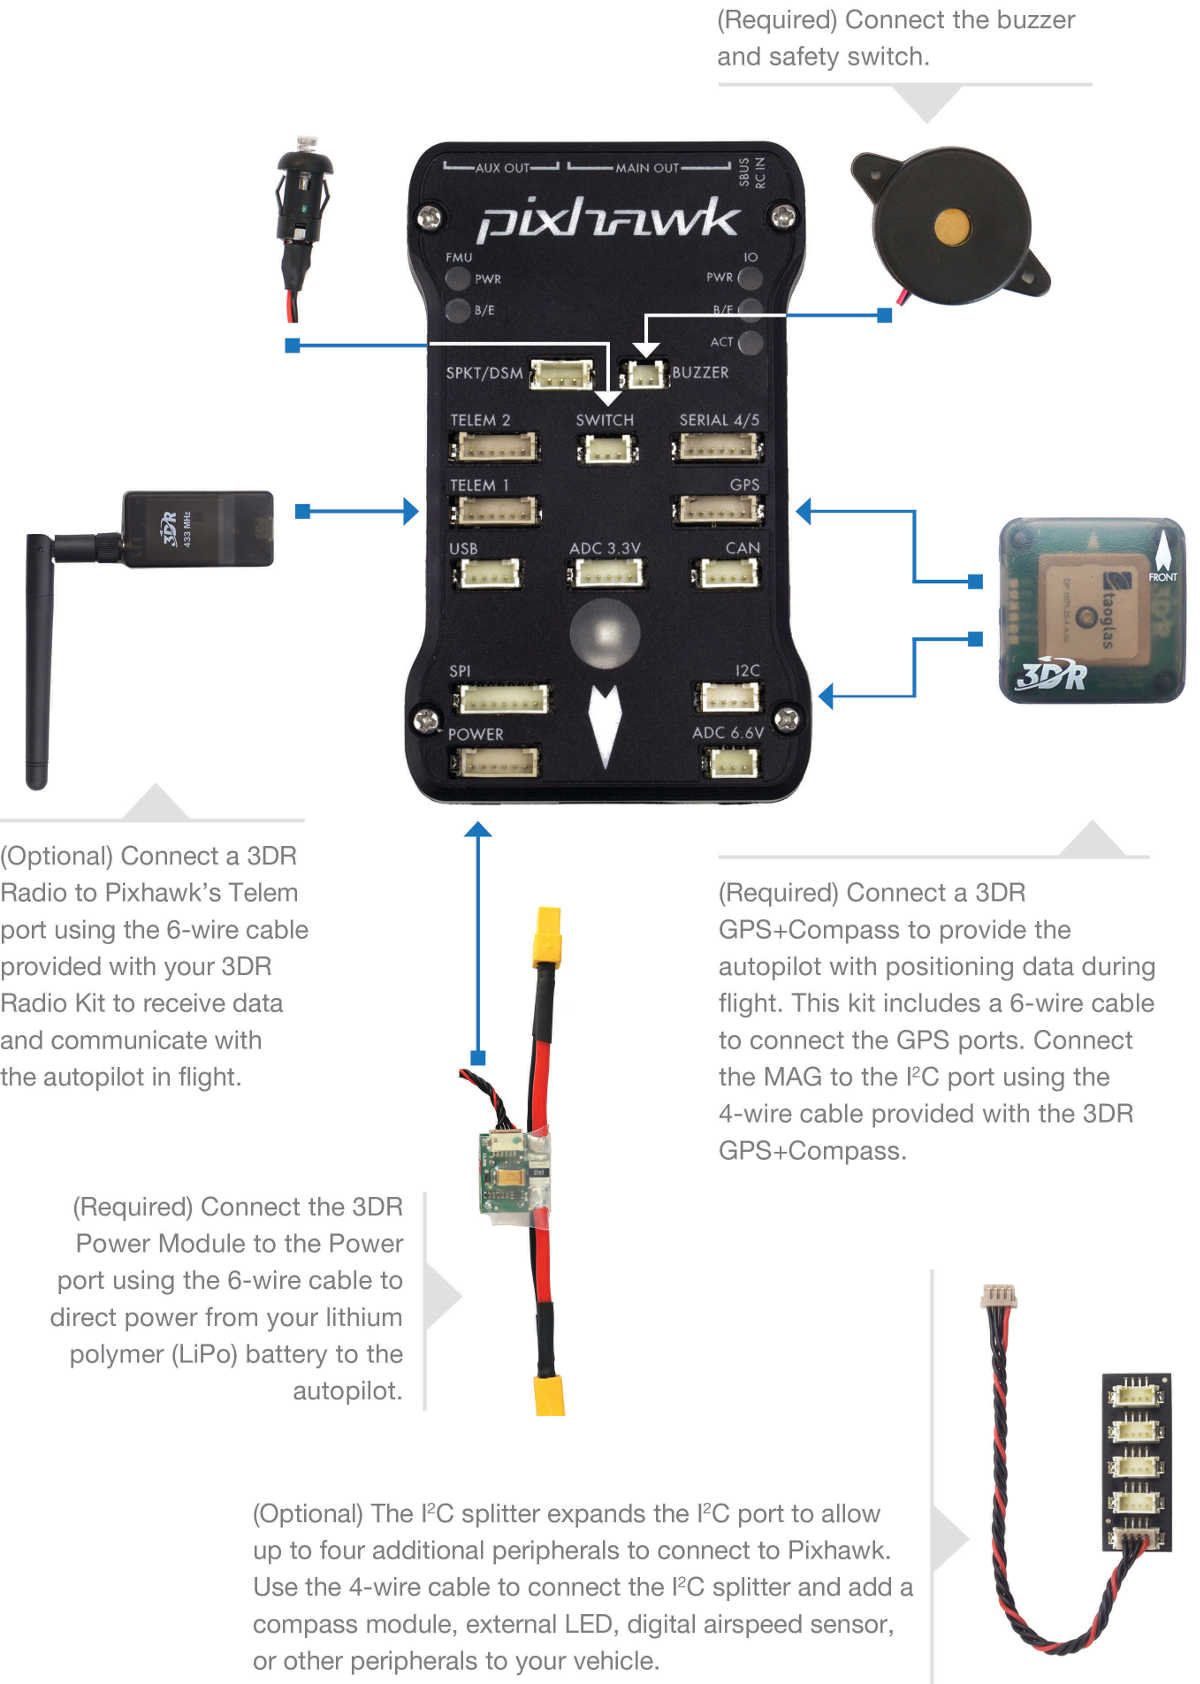
Here is the basic connection to be made before proceeding any further.
Hang on tight, it’s is going be a bumpy ride (I’m talking to pixhawk, not you silly)
1. Flash firmware to pixhawk
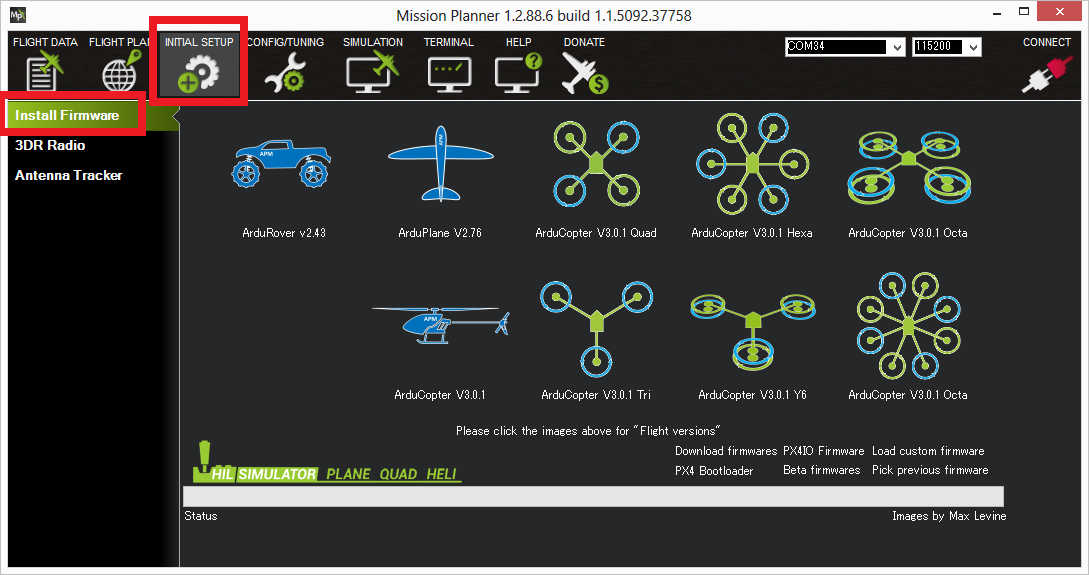
We will be using ardupilot firmware. This can be flashed through mission planner.
Here is the detailed instruction to install firmware to pixhawk.
2. Calibrate Accelerometer and Compass

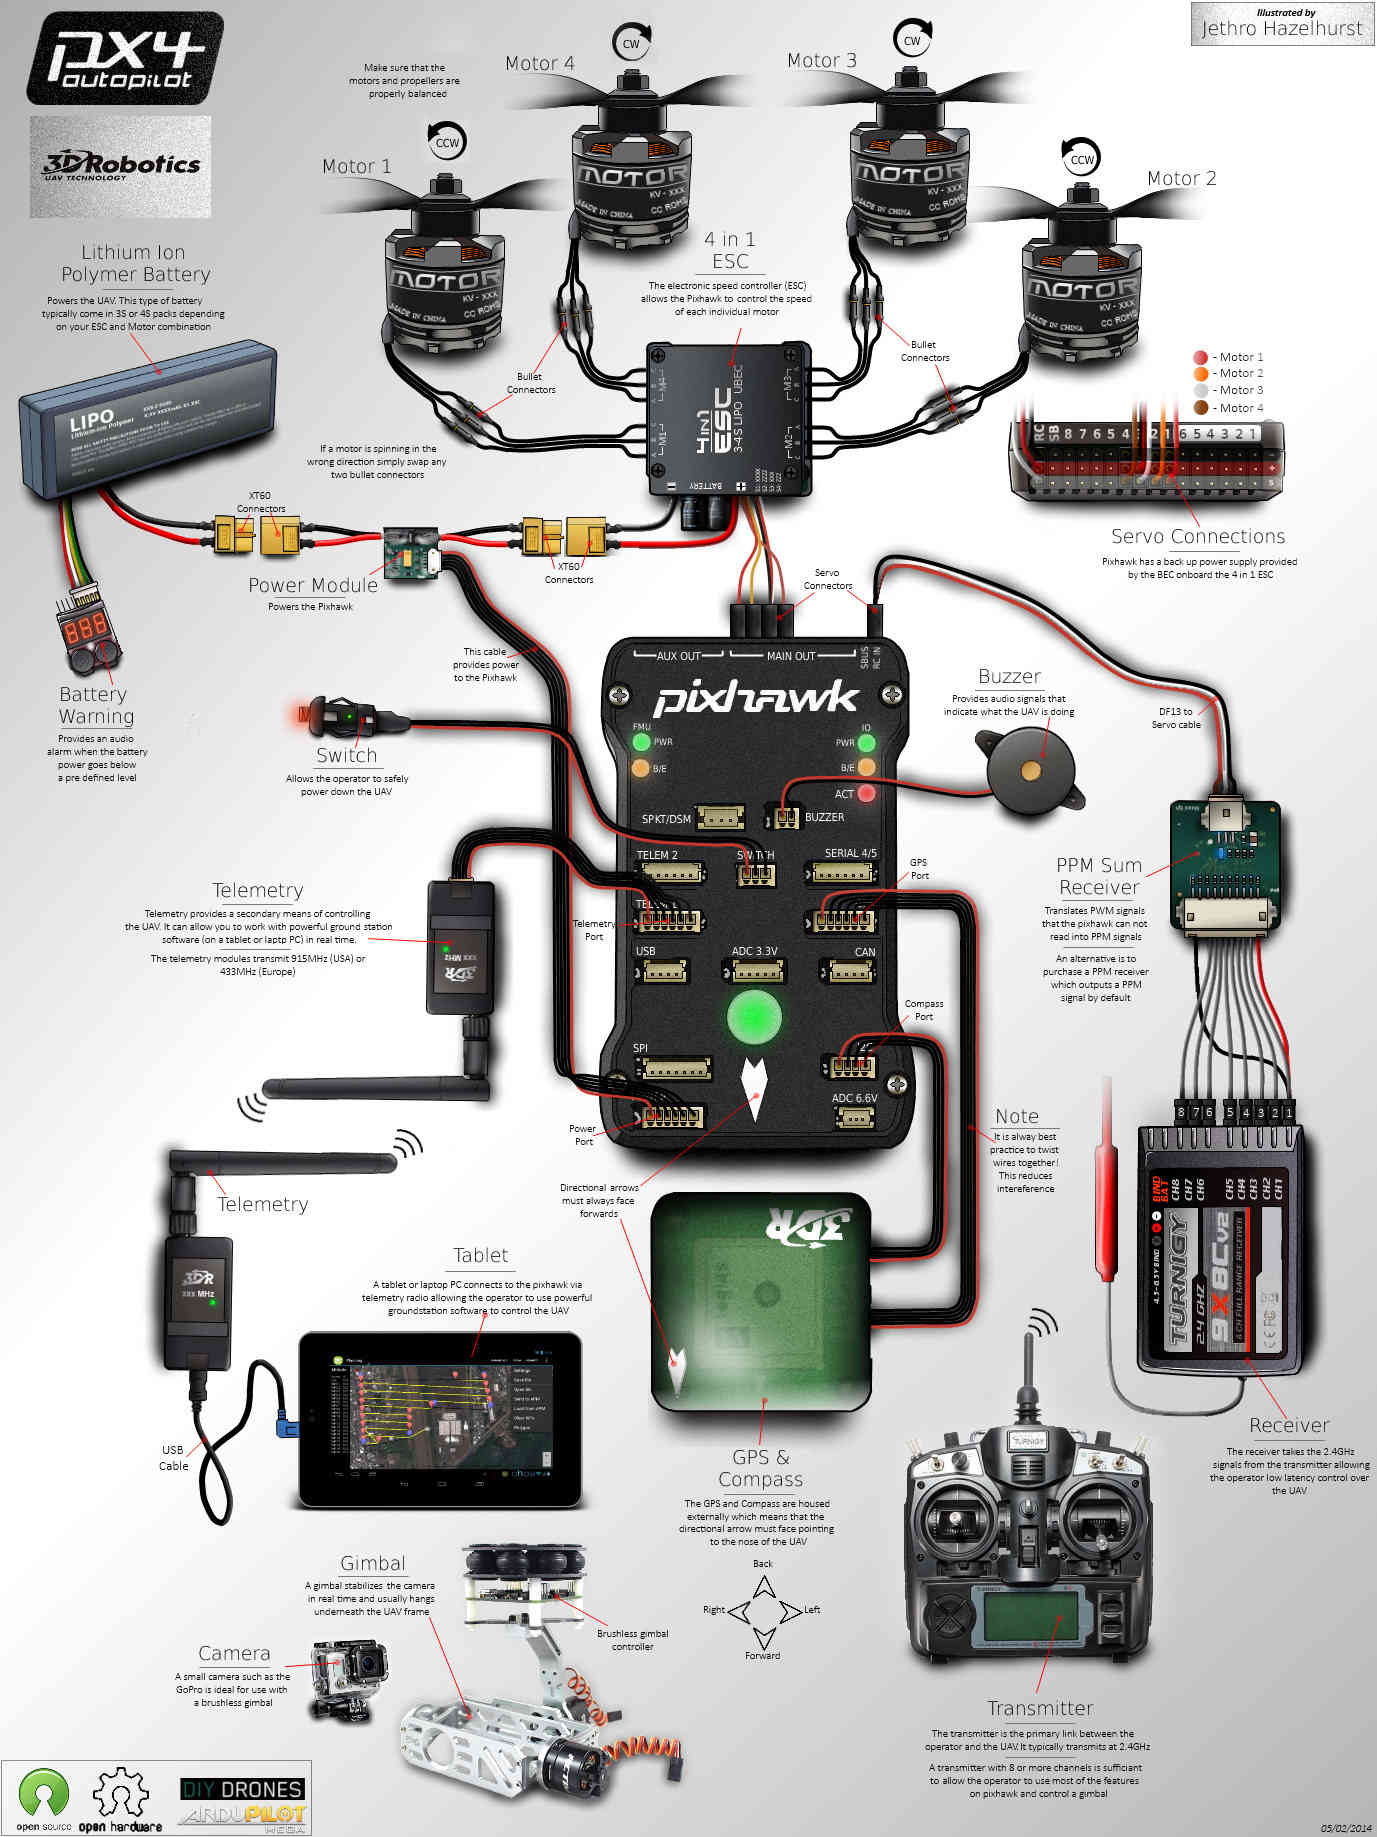
3. Connect RC, ESC and Motors
I’m sure many of you have seen this diagram. Have eveything connected and ready.
Note: Don’t connect propellers
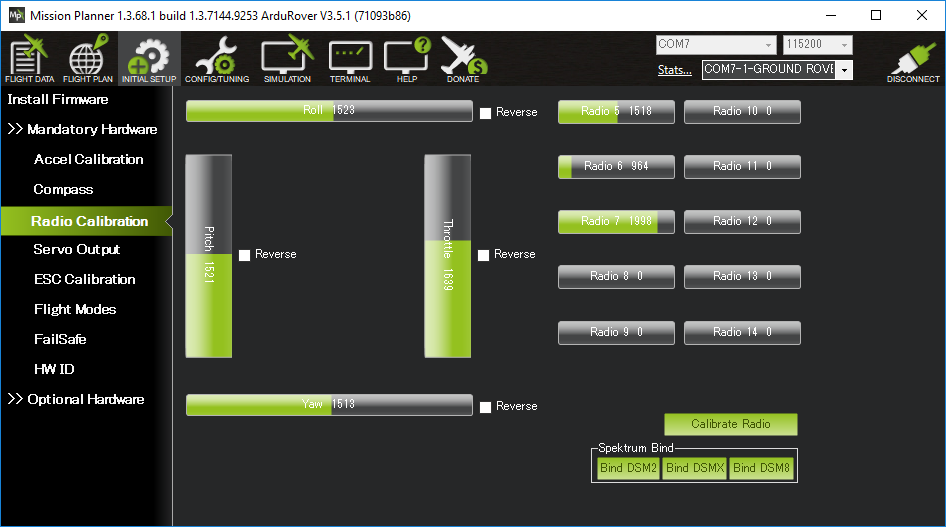
4. Calibrate Radio Control
5. Calibrate ESC
Note: remove propellers if attached

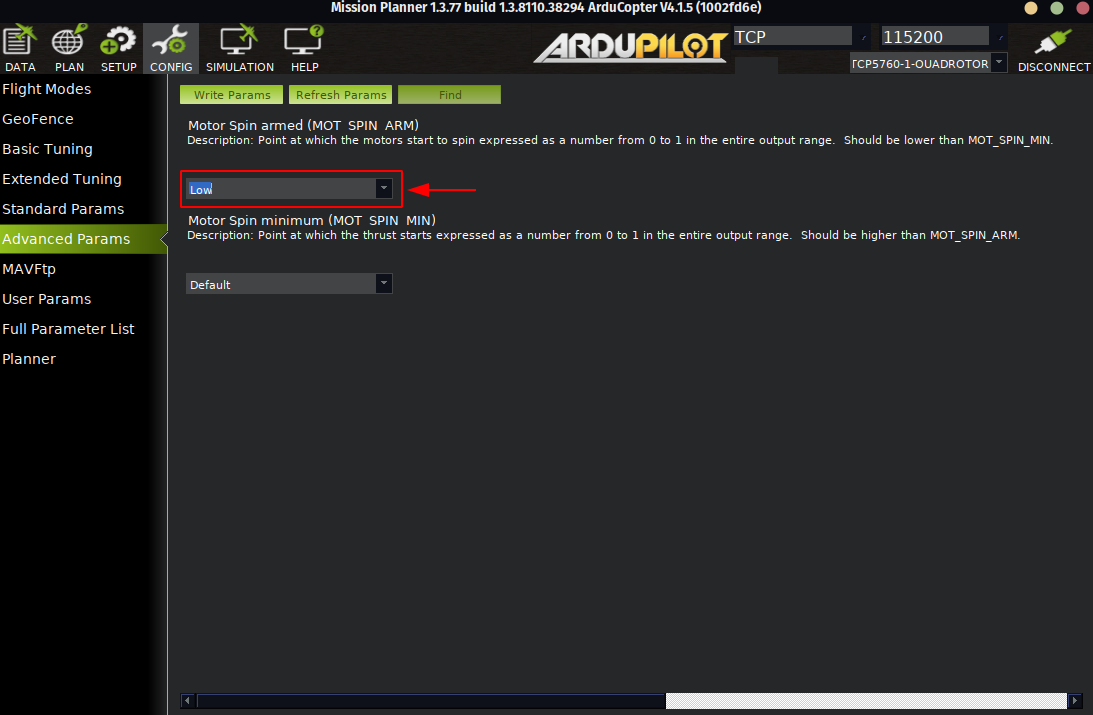
6. Setting extra parameter (Optional)
By default motors will start spinning when armed even at zero throttle. To only spin when throttle is given, following setting needs to be changed.
-
Go to CONFIG -> Advanced Params
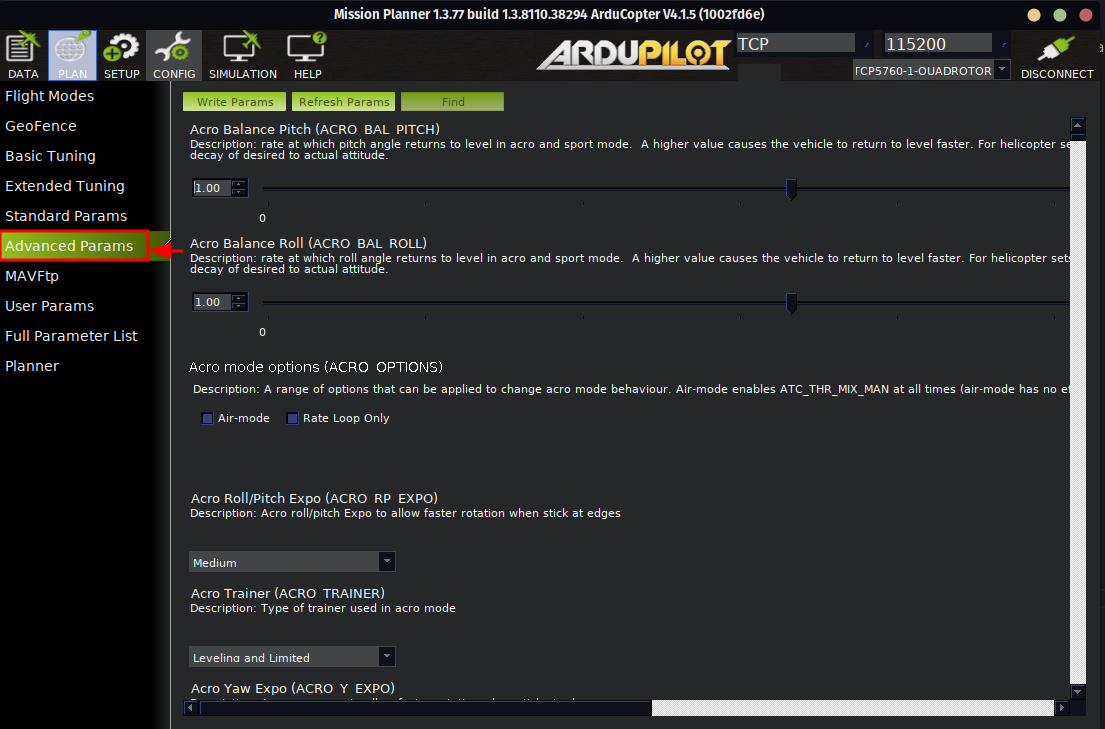
-
Find -> Type MOT_SPIN_ARM and click OK

-
Set Motor Spin armed -> Low
7. Assemble for test flight (Not so fast)
Get eveything assembled to frame, attach propellers and tuck in hanging wires.
- Double check esc, motor and propeller connection configuration. Note: Don’t arm yet
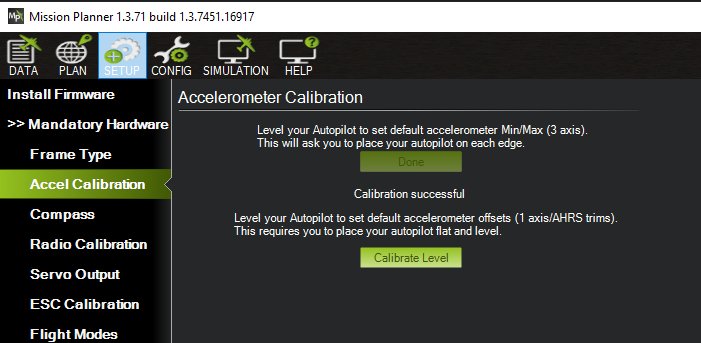
8. Calibrate Level
Place the assembled copter on plain flat surface and click on Calibrate Level. This is to set reference point to copter to be stable.
9. Setting another extra parameter (Optional)
To make life easy, swtiches comes in handy. To arm and disarm default method is hold throttle stick to down-right for 5 seconds. To assign this to a switch follow How to set ARM-DISARM Switch in Mission Planner and RC Transmitter for Pixhawk.
10. Fly my child 🕊️
This is a test flight so be cautious of your surrounding and not to fly beyond 2 meters. Keep it low and steady.
- Set the flight mode to Auto or Loiter.
- Turn on safety switch and arm the motors.
- If you have not followed step 9, then follow this arm and disarm.
Comments